Recently, my friend and I participated in an OpenAI hackathon with a simple goal — to make character.ai with 3D characters. Going into the hackathon, we knew that the biggest unknown was our familiarity with RealityKit and the USDA ecosystem. In this blog post, I will share how we managed to pack 20+ animations in a single 3D asset represented as a .usda file.
Show me what it looks like first
Below is a video of our app "Buddy" - you should download it and let us know what you think. The green buddy displayed in the video is a 3D character we created that lives in your AR space. You can give it a personality & profession and have a conversation with it. However, the most interesting part is that Buddy here not only talks back to you with a human-like voice but also moves and emotes with animations that best suit their response. So, how did we do this?
Background
First off, if you don't know about Mixamo, you are welcome. Mixamo is a free tool that we got all of our animations for Buddy from. The cool thing about Mixamo is that it not only has free 3D assets and animations but also offers a tool called "auto-rigging". The tool essentially can take any 3D figure that resembles a human figure and rig it so that it's compatible with any of their existing animations.
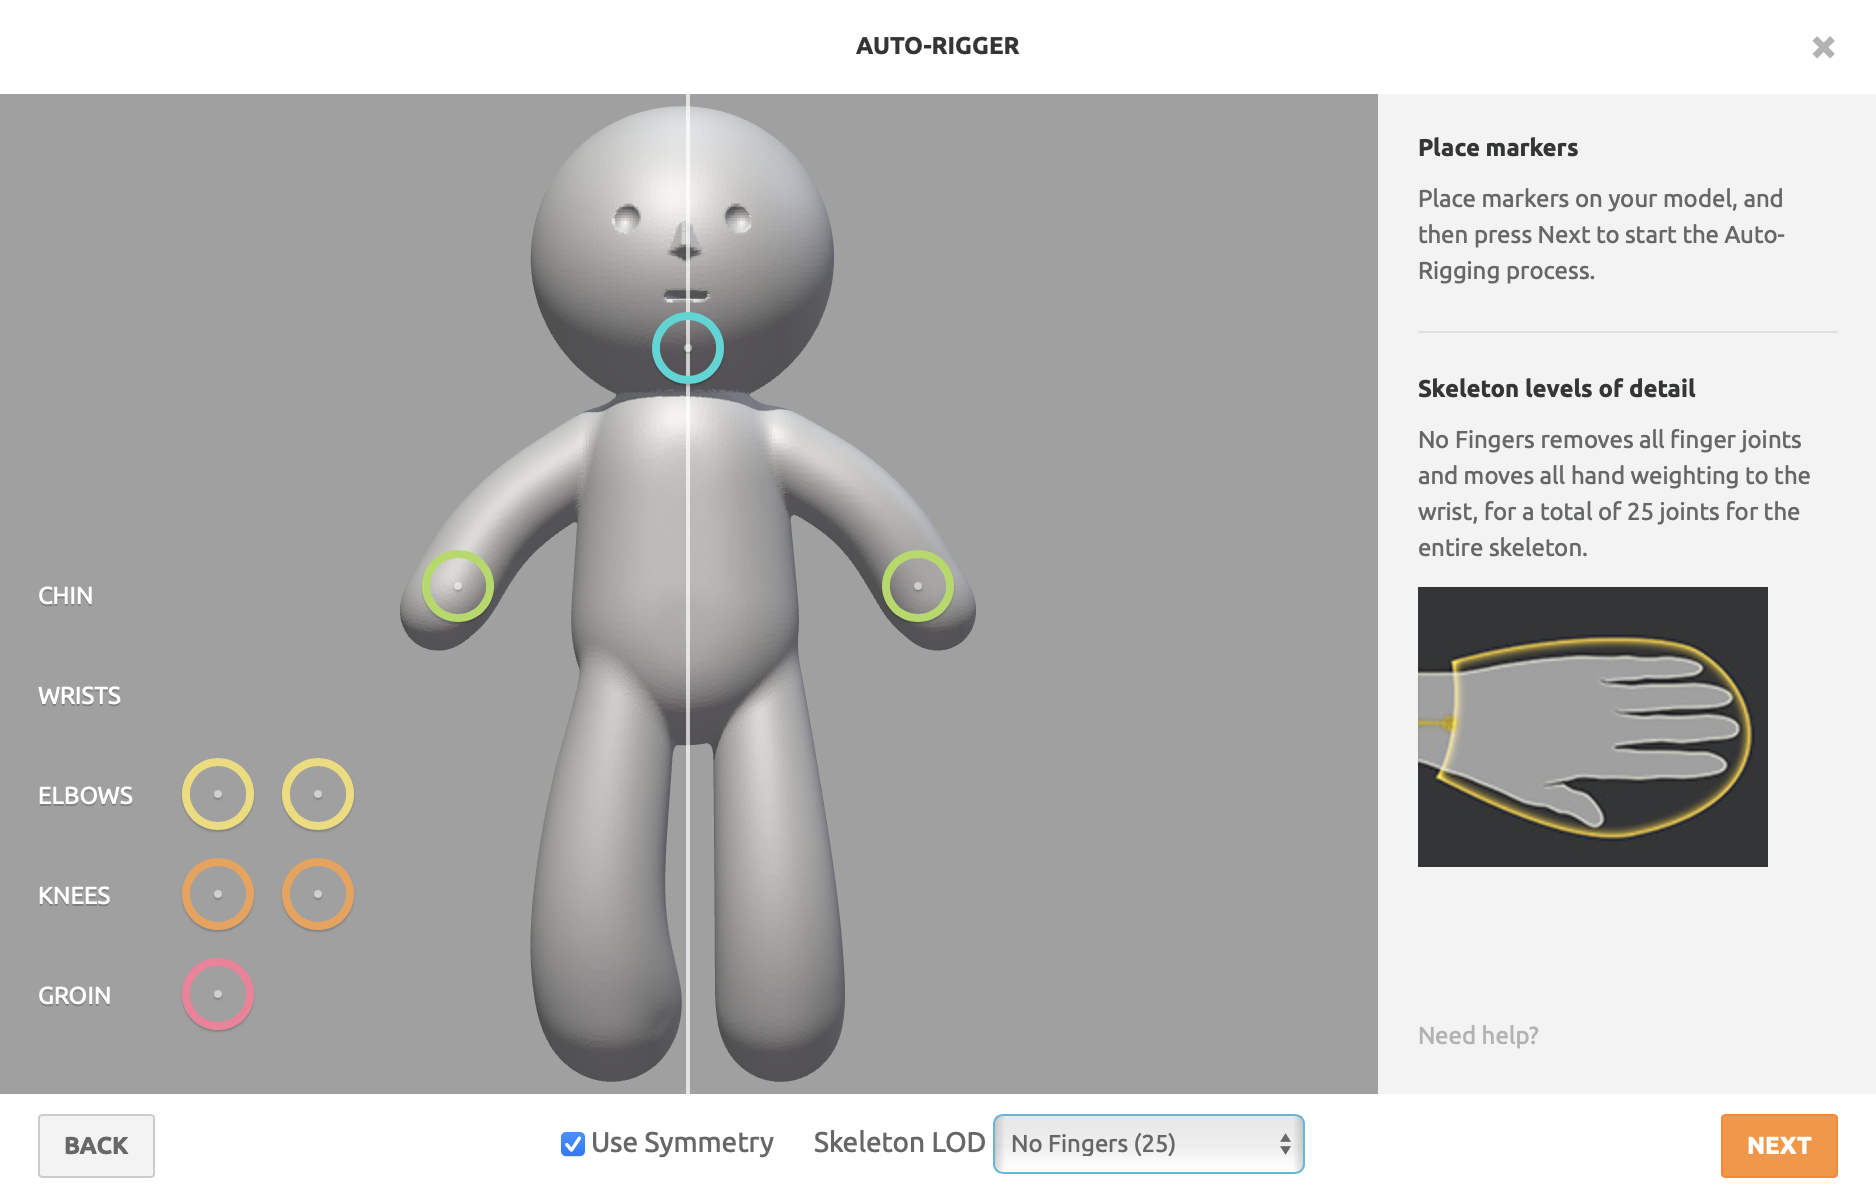
If you are any familiar with 3D graphics world, you'll know that no one - not even paid professionals - like rigging. The fact that Mixamo does this in seconds and for free is insane. Ok, enough about that.... back to the main story.
Naive Method: 1 animation per USDA file
If you tried importing and using a USDA file, you probably have written code that looks like this.
let entity = try? Entity.load(named: "SomeAsset", in: realityKitContentBundle)
if let animation = entity?.availableAnimations.first {
    entity.playAnimation(animation)
}
This works great for USDA files that have one animation in them. For example, if you download an animation from Mixamo, you will get a .fbx file that has a single animation in it. Once you run it through the Reality Converter, you will get a .usda file with a single animation in it. So this lets us run a single animation. Great. But what if we want to play multiple animations for the same 3D asset? The naive solution I came up with was the following.
Since we retrieve animations via the
availableAnimationsproperty of an entity, why not have a single entity file per animation? When we want to play an animation, we would load the entity and fetch the single animation from it and play it on our entity.
let idle = try? Entity.load(named: "idle")
func play(animation: CustomAnimation) -> AnimationResource?
if let matchingEntity = try? Entity.load(named: animation.rawValue),
let animation = matchingEntity.availableAnimations.first {
return animation
} else {
return nil
}
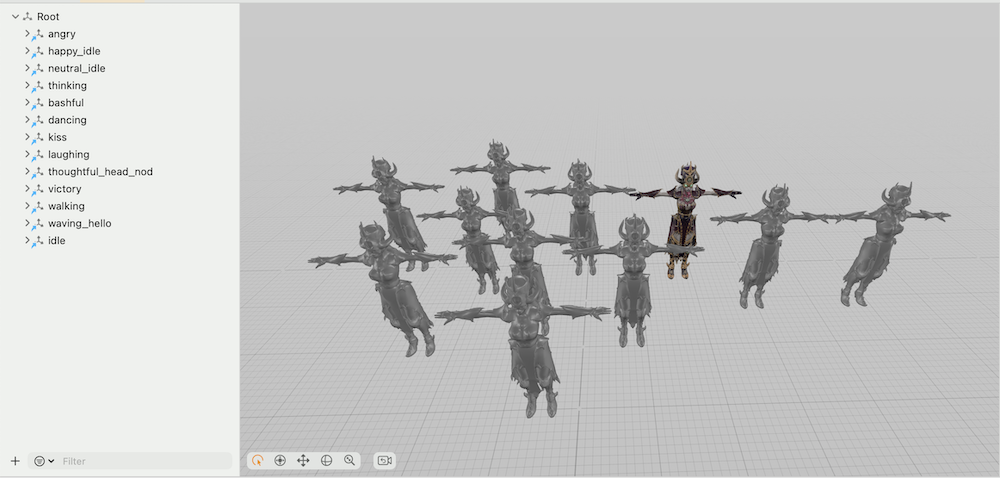
}This approach worked fine... But below is what the Reality Composer Pro scene looked like. As you can probably see, the setup was definitely not pretty. But we found out there are other side-effects of this approach.
- App size exploded
Well, this was obvious. We were basically importing redundant 3D models that were just being used as a delivery method for an animation. We also wanted a character to have at least 10 animations and one character was about 50MB... So the math for our app size became
(50mb x number of animations) x number of characters = yikes
- Our build & app launch time slowed down, a lot
One of the side effects of a large app was that everything slowed down. It took seconds for the app to launch. It took minutes to compile all the usda assets. Not cool 😵💫
Still naive but slightly better method 2
Our app launch speed was so slow at this point that we had to figure something out. After couple minutes, we thought
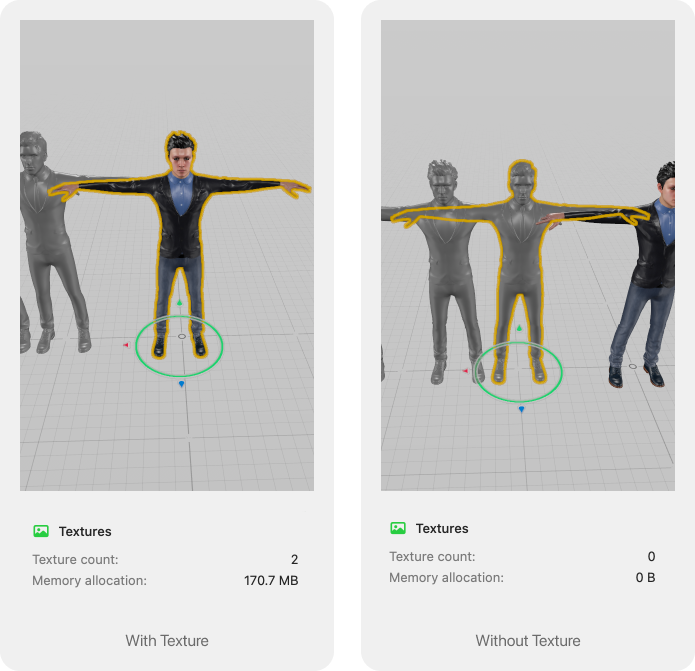
Wait, if we are only using these entities as a delivery method for various animations, why not just nuke the textures from the 3D assets? After all, textures for these 3D files were the majority of the file size.
This was a small change but had immediate results. This model in particular, had textures that were 170Mb large. In the end, we were able to save
170mb x number of animations = not trival at all
💡 Quick tip: When you are converting your .mbx file to .usda using Reality Converter, you can also choose to export the "compressed" version of the asset to save non-trivial amounts of storage once again. This will mangle your asset but this doesn't matter when you are using your asset just for the animation 🙃
Winning method: Single file for all animations
Method 2 saved us a lot of storage but we knew that it wasn't scalable. We knew that we eventually would have to combine all animations into a single file. This meant only one thing... time to download and learn Blender. Thankfully, the Blender community is strong and mighty. I went on Youtube and searched for "combine multiple animations in to a single timeline" and after about 3 videos, things started to make sense. Let me give you a quick tl;dr here.
The idea of combining multiple animations into a single timeline is actually something Apple recommends in this WWDC talk.
Step 1. Import your animations
First step is straightforward. Get yourself a 3D asset with a single animation - preferably all from the same source - and import it to your Blender file. For me, it was a .fbx file I downloaded from Mixamo.
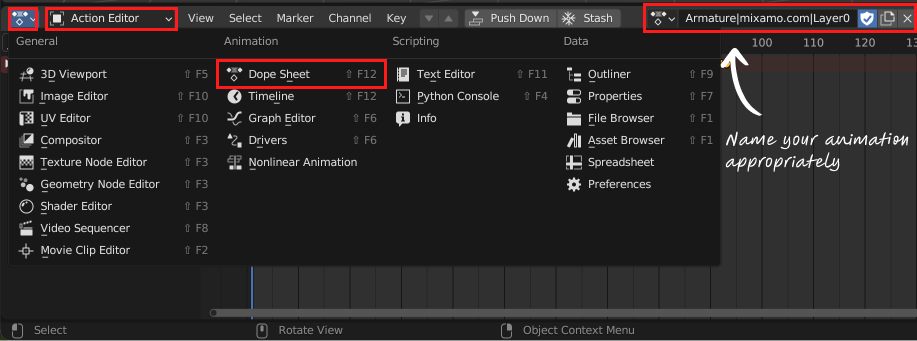
Step 2. Name the animation
In the bottom panel of Blender, navigate to Dope Sheet -> Action Editor. Make sure to click on the "Armature layer" of your character and name the animation to a fitting name.
Step 3. Delete the model
You heard me right. You can now delete the 3D model. This is because once you name the animation, the animation is now saved in your Blender file and still accessible.
Step 4. Combine the animation to the timeline
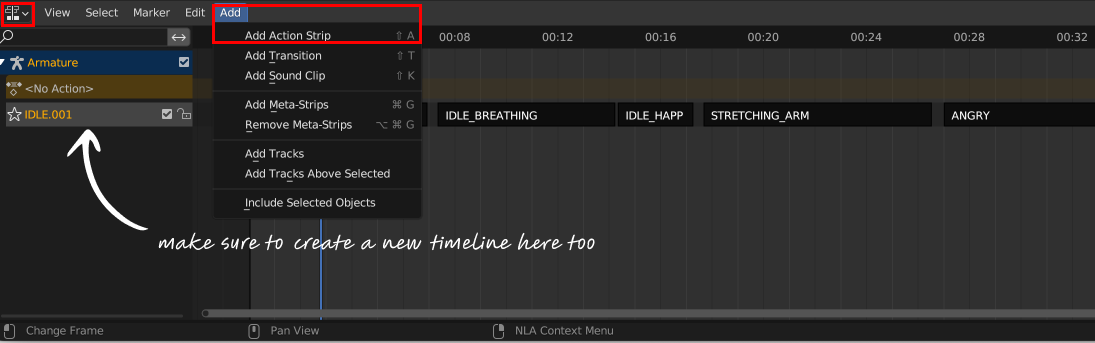
Time to combine the new animation to our timeline. Navigate to "Nonlinear Animations" and make sure your Armature layer is still highlighted. Click on "Add -> Add Action Strip" and you should see your recently named animation in the drop down. From here, the timeline UI resembles that of iMovie. Feel free to place the animations in whatever way that pleases you.
Step 5. Load, slice and play animations in RealityKit
Now that we have all the animations in a single timeline, feel free to export the file as FBX, convert it to USDA, and import it into your Xcode project.
To play a single animation, we now have to know the start and end time of the animation we want to play and trim the unified animation timeline accordingly. To make this happen in an organized way, I created an Animation enum with start and end frame for each animation - you can get this information from Blender by hovering over each entry in the timeline UI.
enum Animation: String, Codable {
    case idle, idleBreathing, idleHappy, idleOffensive...

    var startTime: TimeInterval {
	    // since animations are 30FPS..
        Double(startFrame) / 30
    }

    var duration: TimeInterval {
		// same here
        Double(endFrame - startFrame) / 30.0
    }

    var startFrame: Int {
        switch self {
            case .idle:
                return 0

            case .idleBreathing:
                return 220

            case .idleHappy:
                return 430
			...
        }
    }

    var endFrame: Int {
        switch self {
            case .idle:
                return 208

            case .idleBreathing:
                return 427

            case .idleHappy:
                return 518
			...
        }
    }
}
To play the animation
let unifiedAnimations = entity.availableAnimations.first!.definition
let def = unifiedAnimations.trimmed(start: animation.startTime, duration: animation.duration)
let controller = entity.playAnimation(animation, transitionDuration: 0.6, startsPaused: false)
Bonus: Sequencing animations
To sequence animations, I tried using the provided in AnimationResource.sequence(with:). However, it turns out there is no option to control the animation transition duration... if I missed something here, please let me know. So instead, I wrote a custom class that is able to play sequences of animations with a nice transition duration in between the animations. I will open source this if there is enough interest but the core piece is the below function
@MainActor
private func playAnimation(animation: AnimationResource, definition: Animation, content: RealityViewContent) async {
   await withCheckedContinuation { [weak self] cont in
		guard let self else { return }

		let controller = self.scene.playAnimation(animation, transitionDuration: 0.6, startsPaused: false

		let sub = content.subscribe(to: AnimationEvents.PlaybackCompleted.self, on: scene) { [weak self] arg in
			guard let self else { return }

			if self.played.contains(definition) {
				return
			}

			self.played.insert(definition)
			cont.resume()
		}

		self.subscriptions.append(sub)
		self.controllers.append(controller)
	}
}
Wrapping up
Well, I hope this was a good guide on how to animate a 3D figure in RealityKit. If you are building something in the space or have any questions, hit me up on X or [email protected]. Happy building 🔨